0400 000 000 We are available 24/7, call us now

How to Install a Gas Cooktop: A Complete Guide for a Safe & Efficient Setup

Upgrading your kitchen with a gas cooktop is a game-changer for both home cooks and professional chefs. Gas stoves provide precise temperature control, instant heat, and cost-effective operation, making them a popular choice in Australian households. But before you dive into installing one, there are essential safety considerations, regulations, and steps to follow.

Whether you’re replacing an old cooktop or setting up a new one, proper installation is critical for safety and efficiency. In this guide, we’ll walk you through the pre-installation considerations, step-by-step setup, and post-installation tips to ensure everything runs smoothly.

Important: While this guide covers the installation process in detail, gas cooktop installation must be performed by a licensed professional in Australia. Incorrect installation can lead to gas leaks, safety hazards, and non-compliance with Australian standards.

Pre-Installation Considerations: What You Need Before Installing a Gas Cooktop

Installing a gas cooktop is not just about placing it on your countertop and connecting a gas line. It requires careful planning, compliance with safety regulations, and the right tools to ensure a safe and efficient setup. Proper preparation minimizes installation challenges and ensures that your cooktop functions optimally for years to come.

How-to-Install-a-Gas-Cooktop-A-Complete-Guide-for-a-Safe-Efficient-Setup: Proper Gas Cooktop check

Before you begin, consider factors like kitchen suitability, ventilation, and adherence to Australian gas safety standards. Additionally, gathering the right tools and materials in advance will help streamline the process. Below, we’ll walk you through the key pre-installation steps to ensure a smooth and safe setup.

1. Check Your Kitchen’s Suitability

  • Ventilation Requirements: A well-ventilated kitchen is crucial to prevent gas build-up. Ensure adequate airflow around your cooktop.
  • Gas Line Access: Your kitchen must have a dedicated gas connection that complies with Australian safety standards. If not, a licensed gas fitter must install one.
  • Clearance Space: There should be enough space between the cooktop and rangehood or cupboards to prevent fire hazards.

2. Understand Australian Safety Regulations

Gas installations in Australia must comply with AS/NZS 5601.1:2022 Gas Installations Standard, which is designed to ensure the safe and legal operation of gas appliances. Key requirements include:

  • Gas appliances must be installed by a licensed gas fitter – DIY installation is not permitted due to the potential risks involved.
  • Cooktops must be properly secured – Loose installations can cause gas leaks and instability.
  • Surrounding materials must be fire-resistant – The benchtop and nearby surfaces should be heatproof to prevent accidents.
  • Gas leak tests are mandatory – After installation, a licensed gas fitter must conduct a gas leak test to confirm that all connections are secure.

Ensuring compliance with these regulations is critical for your safety and to avoid legal or warranty issues.

3. Gather Necessary Tools & Materials

Having the right tools and materials ready before installation will save you time and effort. Here’s a list of essentials:

  • Adjustable Wrench – Used to tighten gas fittings securely without over-tightening.
  • Gas-Rated Thread Sealant Tape – Prevents leaks at connection points and ensures an airtight seal.
  • Soapy Water Spray Bottle – A simple yet effective tool for checking for gas leaks after installation.
  • Screwdrivers & Drill – Needed to secure the cooktop in place and make necessary adjustments.

By taking the time to properly evaluate your kitchen, understand safety standards, and prepare the right tools, you’ll be set for a smooth, hassle-free gas cooktop installation. If in doubt, always consult a licensed professional to ensure safety and compliance.

Step-by-Step Installation Guide: How to Install a Gas Cooktop Safely

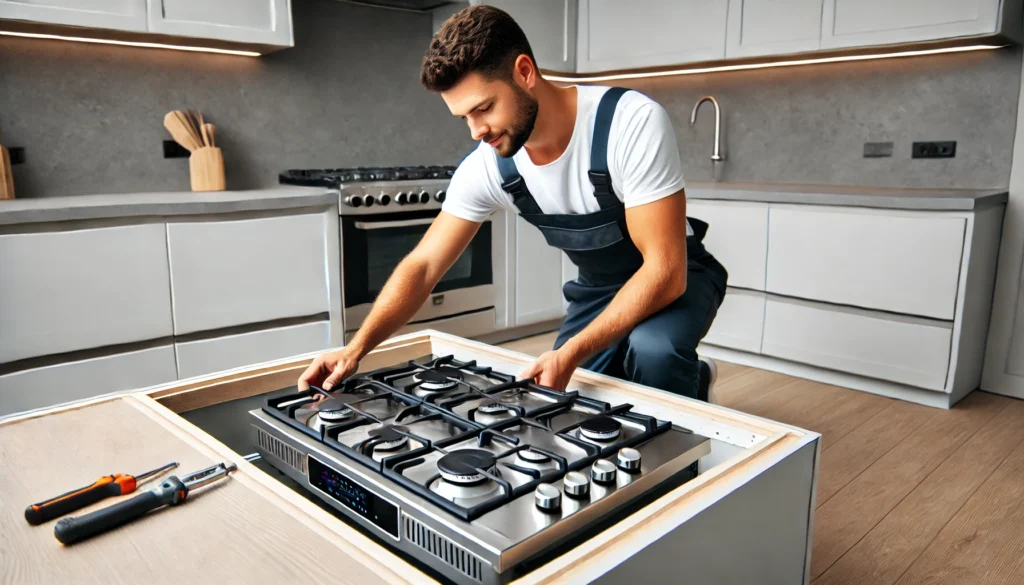
Installing a gas cooktop is a task that requires precision, safety awareness, and compliance with Australian gas regulations. Whether you’re upgrading an old unit or setting up a brand-new installation, following the correct procedures is crucial to ensure a secure and efficient connection.

Below is a detailed breakdown of the gas cooktop installation process, outlining each step carefully so you can avoid common mistakes and ensure a safe setup.

Step 1: Preparing the Installation Site

Before starting the installation, preparation is key. A well-prepared installation site ensures that the cooktop fits properly and that the gas supply is safely managed.

Turn Off the Gas Supply

  • Locate the gas shutoff valve and turn it off to prevent accidental gas leaks during installation.
  • If the shutoff valve is difficult to access or missing, consult a licensed gas fitter before proceeding.
    • Locate the gas shutoff valve and turn it off to prevent accidental gas leaks during installation.
    • If the shutoff valve is difficult to access or missing, consult a licensed gas fitter before proceeding.

    Remove the Old Cooktop (If Applicable)

    • If replacing an existing cooktop, carefully disconnect the gas line using an adjustable wrench.
    • Loosen any securing brackets or screws, then gently lift the cooktop out of the countertop.
    • Check for damage in the cutout area, gas lines, and electrical connections before proceeding.

    Clean the Installation Area

    • Wipe down the countertop cutout to remove debris, grease, and dust that could interfere with proper sealing.
    • Check that edges are smooth and even to ensure the new cooktop sits flush.

    Measure & Mark the Placement

    • Compare the cooktop dimensions to the existing cutout—modifications may be needed if the new unit is a different size.
    • Mark the exact placement to ensure proper alignment with gas and power connections.

    Pro Tip: If adjustments to the countertop are necessary, use a jigsaw with a fine-tooth blade for precision.

    Step 2: Connecting the Gas Supply

    Once the installation area is prepared, the next step is to safely connect the cooktop to the gas line.

    Position the Cooktop in Place

    • Carefully lower the cooktop into the cutout, ensuring a snug and secure fit.
    • Align the cooktop evenly, avoiding any gaps or misalignment that could affect performance.

    Attach the Gas Hose to the Cooktop Regulator

    • Apply gas-rated thread sealant tape to the connection threads to prevent leaks.
    • Secure the gas hose to the regulator, ensuring a firm but not over-tightened fit.

    Important: Only use approved gas hoses and regulators that meet Australian gas safety standards.

    Connect to the Gas Line

    • Attach the gas hose to the main supply valve, ensuring it’s properly threaded.
    • Use an adjustable wrench to tighten the connection, but avoid over-tightening, which can damage the fittings.

    Pro Tip: If the gas line is rigid, you may need a flexible gas connector to bridge the gap safely.

    Step 3: Securing the Cooktop

    To prevent shifting and movement during use, the cooktop must be properly fastened into place.

    Use Mounting Clips or Brackets

    • Most gas cooktops come with manufacturer-supplied mounting brackets.
    • Secure the unit as per the manufacturer’s instructions, ensuring a tight but not forceful fit.

    Double-Check Leveling

    • Use a spirit level to confirm that the cooktop is perfectly horizontal.
    • An uneven cooktop can cause uneven heating and affect flame stability.

    💡 Pro Tip: If needed, use shims or small spacers to adjust the level before fully securing the unit.

    Step 4: Testing for Leaks & Ensuring Proper Functionality

    Before using the cooktop, leak testing and burner function checks must be performed to ensure safety.

    Turn On the Gas Supply

    • Slowly open the gas valve to release pressure into the system.
    • Listen for hissing sounds, which could indicate an undetected leak.

    Perform a Soapy Water Leak Test

    • Mix dish soap with water in a spray bottle.
    • Spray the solution around all gas connections (regulator, hose, and main gas valve).
    • Watch for bubbles—if they appear, this indicates a gas leak.
    • If leaks are found, immediately turn off the gas supply and re-tighten the fittings.

    Pro Tip: If leaks persist despite re-tightening, call a licensed gas fitter—do not attempt further fixes yourself.

    Test the Burners for Proper Operation

    • Ignite each burner and observe the flame color:
      • Blue flame = Proper combustion (ideal).
      • Yellow or orange flame = Incomplete combustion (requires adjustment).
    • Check for flickering or inconsistent flames, which may indicate a gas pressure issue.

    Pro Tip: If the flame doesn’t ignite properly, check if the burner caps are aligned correctly—misalignment can block gas flow.

    Final Safety Checks & Recommendations

    Before wrapping up the installation, perform these final safety and functionality checks:

    Double-check all connections one last time.
    Ensure the cooktop controls function correctly (adjusting flame levels, turning burners on/off).
    Keep a fire extinguisher nearby in case of emergency.
    Schedule a professional inspection if you’re unsure about any step.💡 Final Tip: Even if everything appears to be working correctly, it’s highly recommended to have a licensed gas fitter inspect the installation for added peace of mind.

    Post-Installation Tips: Maintaining & Troubleshooting Your Gas Cooktop

    A properly installed gas cooktop is only as good as its maintenance. To ensure optimal performance, safety, and longevity, regular upkeep is essential. By cleaning components, checking for gas leaks, and troubleshooting common issues, you can keep your cooktop running smoothly while preventing potential hazards.

    How-to-Install-a-Gas-Cooktop-A-Complete-Guide-for-a-Safe-Efficient-Setup: Gas Cooktop installation

    Below, we’ll outline key maintenance practices and solutions for common cooktop issues so you can address problems before they escalate.

    Regular Maintenance Practices

    Consistent maintenance ensures that your gas cooktop operates efficiently and safely. Here’s what you should do regularly:

    Clean Burner Heads Weekly

    • Over time, food debris, grease, and dust can clog the burner ports, leading to uneven or weak flames.
    • Remove the burner caps and use a soft brush or needle to clean out any obstructions.
    • For deeper cleaning, soak burner components in warm, soapy water, rinse thoroughly, and let them dry before reassembling.

    Check for Gas Leaks Monthly

    • Gas leaks pose serious risks, so it’s important to inspect connections regularly.
    • Perform a soapy water test by applying a mixture of water and dish soap to the gas connections—if bubbles appear when the gas is turned on, there’s a leak.
    • Never ignore a suspected leak—turn off the gas immediately and contact a professional.

    Schedule Annual Inspections

    • Even if your cooktop seems to be working fine, a yearly professional inspection ensures it remains in top condition.
    • A licensed gas plumber will check for wear and tear, hidden leaks, and pressure issues, preventing costly repairs down the line.

    Troubleshooting Common Issues

    Even with regular maintenance, gas cooktops can occasionally experience problems. Here’s how to identify and resolve common issues:

    Weak or Uneven Flames?
    Cause:
    Clogged burner ports, improper gas pressure, or incorrect burner placement.
    Solution:

    • Remove and clean the burner ports using a soft brush or toothpick.
    • Ensure that the burner cap is correctly aligned—misalignment can disrupt the flame.
    • If flames remain weak, check the gas pressure—low pressure could indicate a regulator issue or gas supply problem.

    Smelling Gas?
    Cause:
    Loose connections, damaged gas lines, or an undetected leak.
    Solution:

    • Turn off the gas supply immediately and ventilate the kitchen by opening windows and doors.
    • Avoid using electrical switches, flames, or appliances until the issue is resolved.
    • Do not attempt repairs yourself—contact a licensed gas fitter for a professional inspection and repair.

    Ignition Issues?
    Cause:
    Dirty igniter, faulty spark module, or moisture buildup.
    Solution:

    • Ensure the igniter is clean and free of grease or food residue—wipe it gently with a dry cloth.
    • If the igniter is clicking but not producing a flame, check that the burner cap is securely placed.
    • If clicking persists and no gas is flowing, the igniter or gas valve may be faulty, requiring professional assistance.

    When to Call a Professional Gas Cooktop Installer

    • If your home lacks a gas connection—a licensed installer must set up the gas line.
    • If you detect persistent leaks—don’t risk it, contact an expert immediately.
    • If you’re unsure about compliance—ensuring your installation meets Australian safety standards is non-negotiable.

    Looking for professional gas cooktop installers near you? A licensed gas plumber can ensure a safe, efficient, and legally compliant installation.

    Conclusion: A Safe Gas Cooktop Installation Ensures Long-Term Efficiency

    Installing a gas cooktop offers amazing cooking control and energy efficiency, but safety is the top priority. By following the correct installation procedures, testing for leaks, and maintaining your cooktop properly, you can enjoy a hassle-free cooking experience.

    Final Reminder: Gas cooktop installation in Australia must be handled by a licensed professional for legal and safety reasons. If you need assistance, consult an expert for peace of mind. Need help installing your gas cooktop? Melbourne Gas Plumber offers expert gas appliance fitting services to ensure your kitchen is safe and compliant.

    BOOK YOUR APPOINTMENT TODAY

    Fill the form below and we’ll get back ASAP!

      WHAT OUR CUSTOMERS SAY

      EMERGENCY SERVICE 24/7

      WE’RE ON CALL DAY & NIGHT!

      Stuart Martin a weeks ago

      MGP! Thank you for help, honest pricing and high quality work. Thank you to Joe for pricing and the boys involved for replacing my hot water tank and fixing my gas leak for a reasonable price. 5 star response, 5 star service and 5 star price.

      Broiny Collins 2 months ago

      Joe was great. Very professional and quick. Gas hot water heater needed replacing, he was honest and upfront about what our options were. System was sourced and replaced within a couple of hours.

      Rage Fitty a month ago

      Fantastic service very responsive Joe is highly recommended and works very clean and neat..... good job well done....very happy... will use again and again

      At Melbourne Gas Plumber, we're here to handle all your gas plumbing needs throughout Melbourne. With over 40 years of experience, we bring extensive local knowledge and expertise to every job.