
Gas bayonet fitting installation is something many Australian households need to deal with. This is especially true if you’re using gas heaters in winter or firing up the BBQ in summer.
A gas bayonet fitting is what lets you connect those appliances to your gas supply in a way that’s quick, clean, and easy to disconnect when needed.
However, messing with gas is serious. A bad installation can lead to leaks, fires, or worse. That’s why even if you’re curious to learn how bayonet fittings work, the smart move is to call in a licensed gas fitter when you’re unsure.
This guide explains how gas bayonet fittings work, what tools you need, and the proper steps to install and use them safely.
Need expert help? Reach out toMelbourne Gas Plumber.
Source: Just Kampers
Gas bayonet fittings are designed to handle high-pressure gas safely while giving you flexibility with your appliances. These fittings are widely used because of their convenience and ease of use, especially in homes where appliances need to be moved, disconnected, or switched regularly.
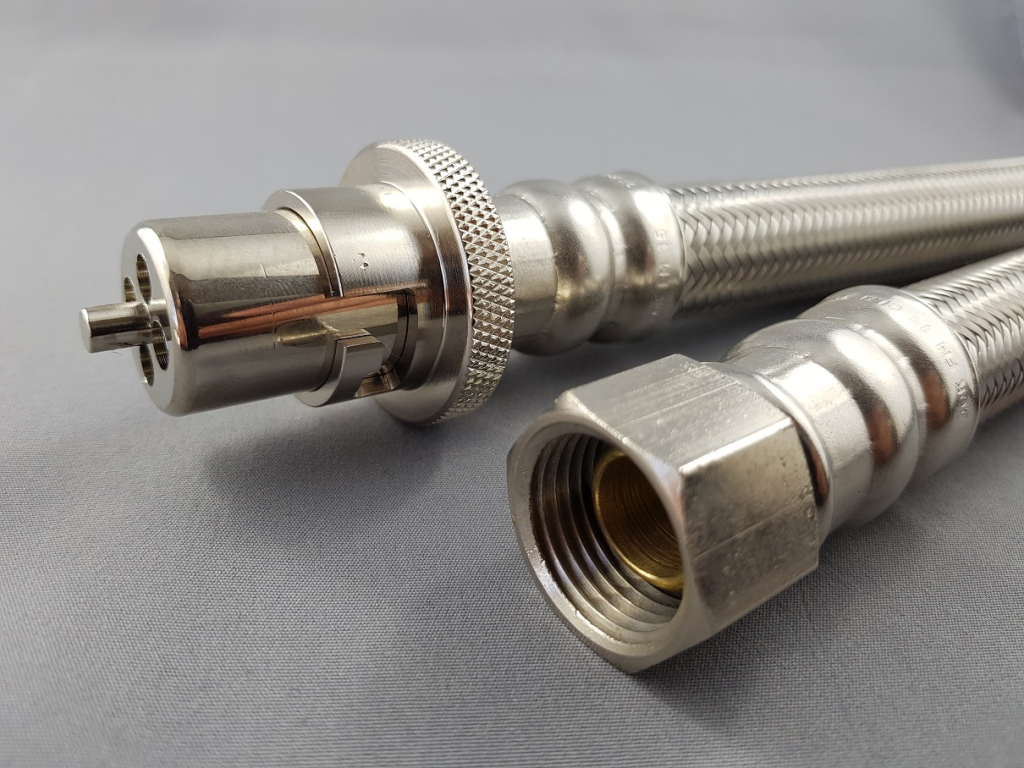
A gas bayonet fitting is a type of gas connector that locks into place with a simple push and twist. It’s made up of two parts: the wall or floor socket (female) and the hose plug (male).
You’ll usually see them near skirting boards inside homes or out on patios. Patios are places where you want the freedom to plug and unplug your gas heater or BBQ without needing a wrench.
Once the plug is inserted and twisted into the socket, it opens a valve inside, letting gas flow to your appliance. When you disconnect it, the valve shuts off the gas automatically.
These fittings work with both natural gas and LPG, but you need to make sure your hose and appliance are rated for the correct type. Also, always stick to the Australian Standard–approved fitting.
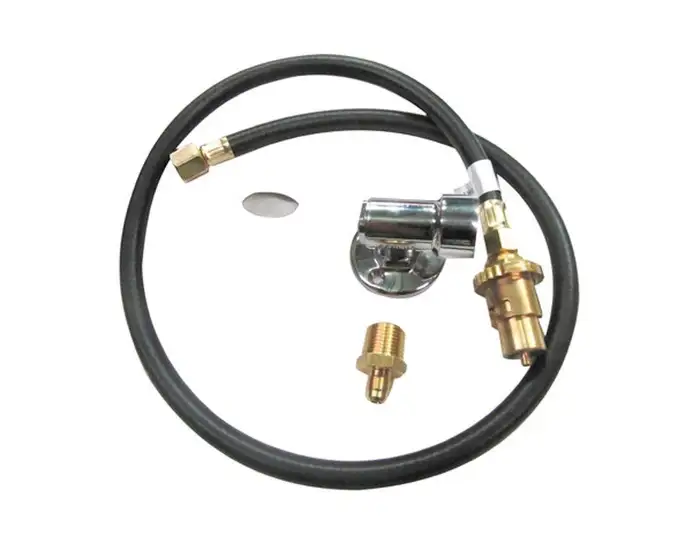
Proper preparation is half the job. Before you even think about installing a gas bayonet fitting, you need to be sure you’ve got all the right tools and components on hand. Missing one item can slow you down or, worse, cause a mistake that leads to a gas leak.
Each part plays a key role in ensuring the connection is secure, leak-free, and compliant with safety regulations. If you’re thinking of installing a gas bayonet fitting, here’s what you’ll want ready before you begin:
Using cheap or incorrect parts is asking for trouble. Stick to quality, gas-certified components.
Now that you understand what a gas bayonet fitting is and have your tools ready, it’s time to walk through the actual gas bayonet fitting installation.
Even if you don’t plan to do the work yourself, knowing these steps helps you understand what’s involved. You can also spot problems if something looks off.
Every step in installing gas bayonet fittings matters. Rushing or skipping details can lead to serious risks. Here’s how the process is generally done:
Smell gas or see bubbles? Turn everything off immediately and get a licensed pro involved. Do not try to fix it yourself. You can call Melbourne Gas Plumber for this issue.
Source: Gas Heater Shop
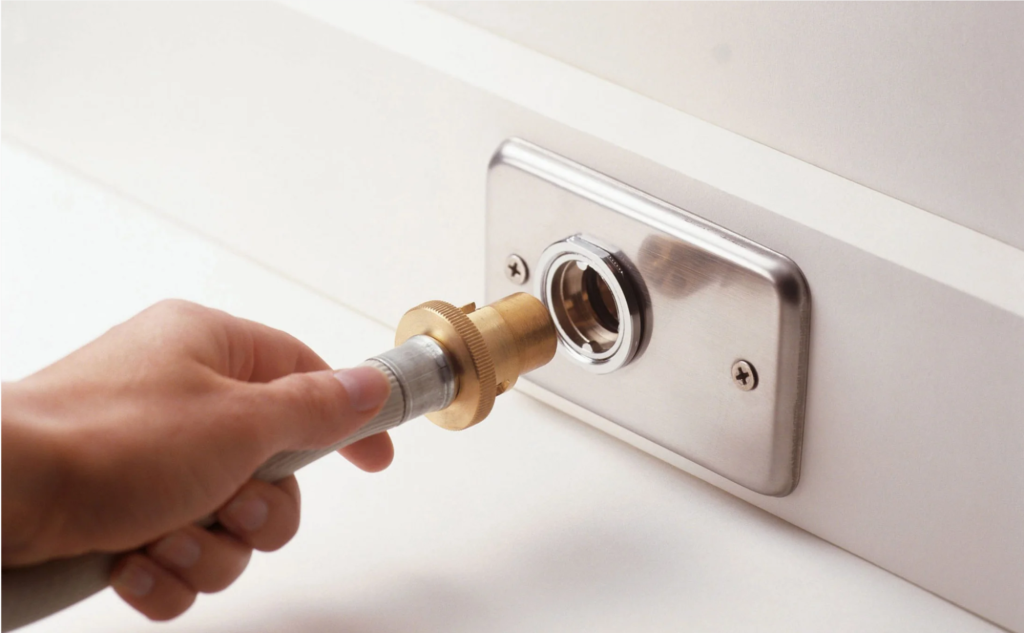
Once the gas bayonet fitting installation is done, using the bayonet fitting correctly every time is just as important. Incorrectly connecting or disconnecting the hose can damage the fittings or cause gas to leak. Thankfully, the process is designed to be straightforward.
Here’s how to safely connect and disconnect a bayonet hose for heaters, BBQs, or other appliances:
To Connect:
To Disconnect:
This process should feel smooth and secure. If you find it difficult to connect or disconnect, or if the fitting feels loose or won’t lock, stop and inspect the parts. A damaged O-ring or worn socket might need replacing.
Source: Gameco
Safety is the thread that runs through every part of installing and using a gas bayonet fitting. By doing this, you can avoid situations that can turn dangerous quickly. Even if your installation looks perfect, skipping these safety checks is a risk you don’t want to take.
Here are some essential safety tips:
A faulty fitting is not something you want to find out about the hard way. Stay safe and get your fittings checked or installed by the pros at Melbourne Gas Plumber.
Gas bayonet fittings are convenient, but they’re only safe when they’re installed and used correctly.
If you want your gas appliances to work reliably and safely, the quality of your bayonet fitting installation matters.
If something doesn’t feel right or you’re unsure about any part of the setup, call in a professional.For trusted, licensed help with installing gas bayonet fittings, reach out to Melbourne Gas Plumber.
Here are some of the most common things people ask about bayonet fittings, especially when it comes to installing gas bayonet connections safely and legally.

Fill the form below and we’ll get back ASAP!

MGP! Thank you for help, honest pricing and high quality work. Thank you to Joe for pricing and the boys involved for replacing my hot water tank and fixing my gas leak for a reasonable price. 5 star response, 5 star service and 5 star price.
Joe was great. Very professional and quick. Gas hot water heater needed replacing, he was honest and upfront about what our options were. System was sourced and replaced within a couple of hours.
Fantastic service very responsive Joe is highly recommended and works very clean and neat..... good job well done....very happy... will use again and again
At Melbourne Gas Plumber, we're here to handle all your gas plumbing needs throughout Melbourne. With over 40 years of experience, we bring extensive local knowledge and expertise to every job.
QUICK LINKS
OPENING HOURS
Open 24/7
